



Create/Connect Database in OCI on Public Subnet
Introduction
By following the steps outlined in this blog, you will be able to configure a Database in Oracle Cloud Interface. The steps in the entire process can comprise the following:
- Generating SSH Keys Pairs In OCI
- Create a Database in a Public Subnet
- Connect to VM DB system.
Pre-Requisites
Considering that the following pre-requisites are already in place:
- Oracle Cloud Account (Free Trial/Paid Version)
- The Network Configuration for Virtual Machine (VM)/ Bare Metal (BM) should be configured
- Public Subnet
- Security List & Open Port 22 & 1521
- Internet Gateway
- Route Table
Let us begin by generating SSH key pairs in OCI:
Section 1: Generating SSH Key Pairs in OCI
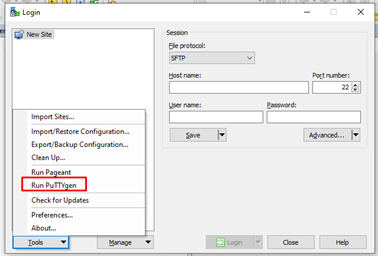
Open WinSCP & Click on Tools -> Run PuTTYgen
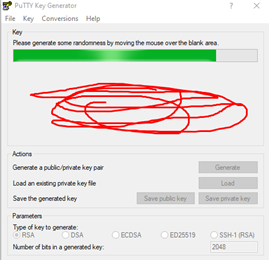
1. To generate the private & public keys, Click on Generate and move the mouse around the blank area in the box as shown above:
2. Key gets generated, as shown in the following screenshot
3. Click on Save private key in your local system.
Add the key passphrase (Password) and re-enter it again to confirm the passphrase.
4. For public key, copy the Key content in a file on your local system which is shown in the following snippet. Sometimes it is required in case of any issue in accepting public key files.
5. Copied key content of public key can be used in such cases.
Then click on Save Public Key to save the file in the same location where the private key was stored in step 3.
Note: Public key format starts with ssh-rsa & ends with rsa-key-20211015
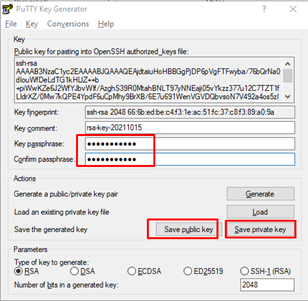
6. Save public key with .pub & private key with.ppk extension
7. After generating and saving both the keys, you can go back to the Cloud Portal.
Section 2: Create Database in Public Subnet
This section involves steps in creating an Oracle Database in Public Subnet on OCI.
Login to OCI console with your tenant. Here ohravi is the Tenant I already created.
So below is the URL
https://cloud.oracle.com/?tenant=ohravi
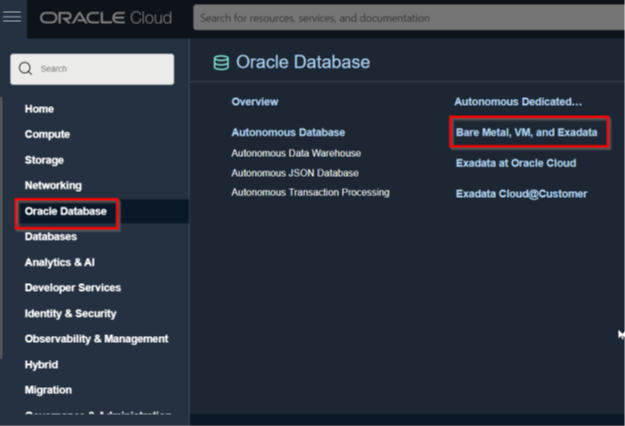
Select the links that are highlighted in Box as per the below snippet
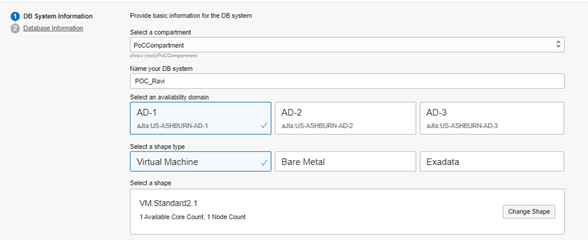
Select the AD & shape as VM with standard shape as per below snippet on the options available
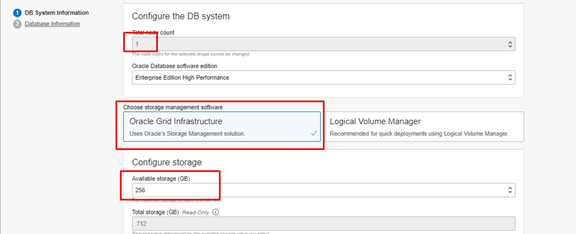
Select the highlighted/indicated in Box as per the below snippet on the options available while configuring the DB system
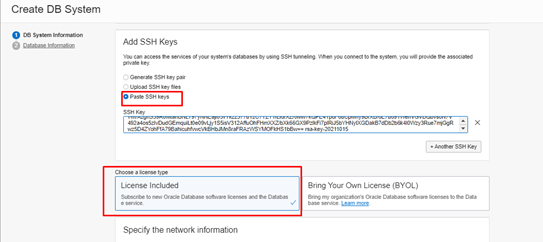
SSH PUBLIC KEY: Paste your Public key created earlier in Section 1 point 5 as shown in the following screenshot
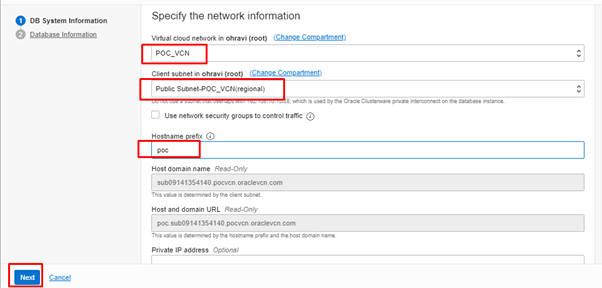
Select a name for the VCN, I have used as POC_VCN & the subnet.
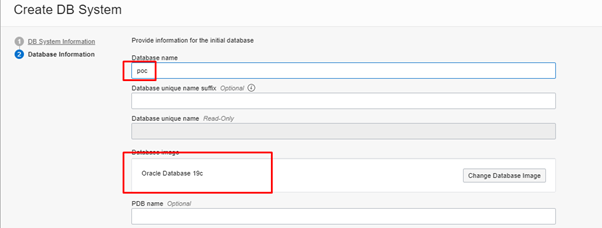
Provide a database name here. I am using POC & 19c in my example
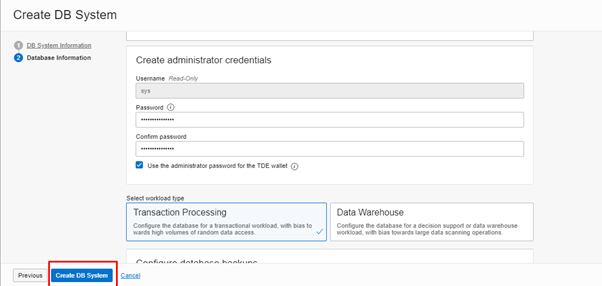
Select create DB system option as indicated in the following snippet
It takes 50-60 minutes to keep the instance Up & Running.
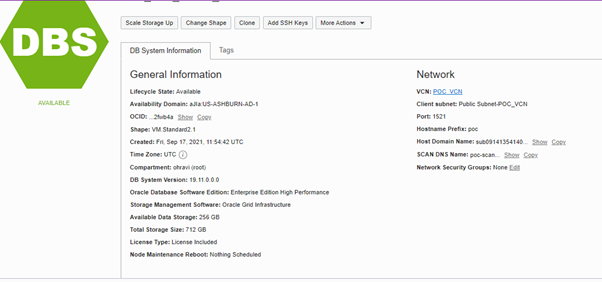
When the DB creation is done, the status changes from Provisioning to Available as shown in the following snapshot.
Section 3: Connect to VM DB System which was created in previous steps
Login to the OCI Console, & navigate to Database Section select database POC_Ravi
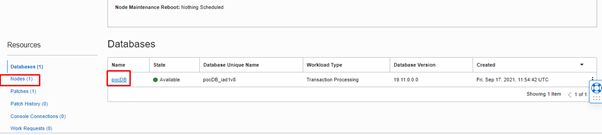
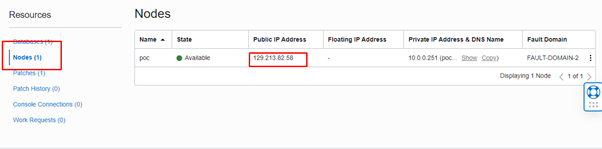
When you click on pocDB above, next page will show the Public IP address as per the following snippet.
Use that IP address in connection as the Host Name in the next step
Open putty
1. Enter the following
– Host Name (or IP Address): Enter opc@Public IP of your instance
– Port: Enter 22
– Connection type: Select SSH
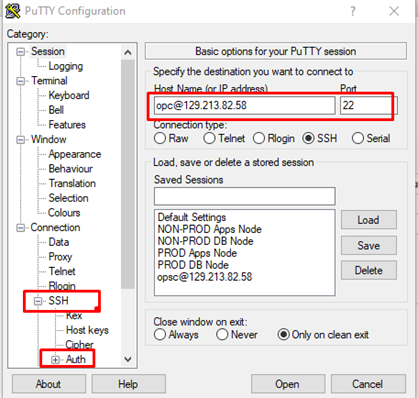
Now, expand SSH and select Auth and browse your private key and click open
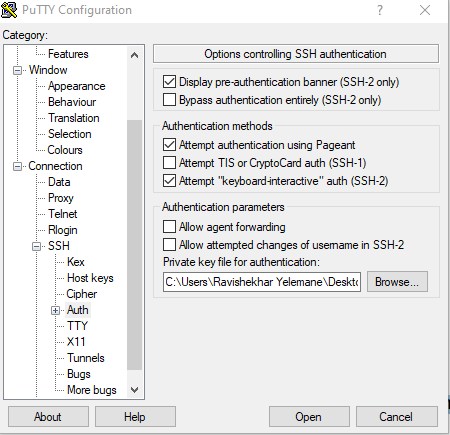
Click on Open
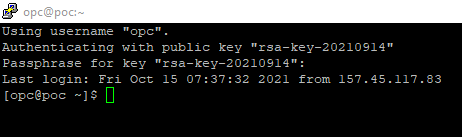
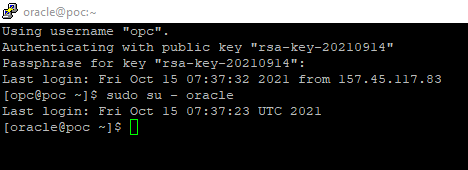
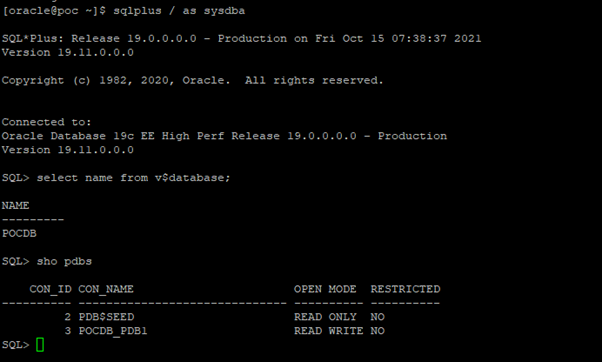
Switch to Oracle user to connect with the SQLPLUS
Conclusion
The blog explains the basic steps of configuring a Database on the Public subnet along with SSH key generation. Also, the above-explained steps help connect to the Database using the SSH keys which are essential for an Oracle Cloud DBA’s routine activity.
Explore Related Articles
From Data Rich to Insight Rich: A Cloud Charter for 2025
AI and data governance are evolving together, and enterprise leaders face three key priorities: proactive AI governance, privacy-first data sharing
Read article
Integrate Oracle EBS with OAM
Integrate Oracle EBS with OAM
Read article
Set up an SSH tunnel to access the Oracle WLS Administration Console
Set up an SSH tunnel to access the Oracle WLS Administration Console
Read article
Introduction to Change Data Capture (CDC)
Introduction to Change Data Capture (CDC)
Read article